Candlemaking
Practical Action
the candles are too warm and the wax is also too hot, one pouring will tend to melt the previous
layer. The temperature of the wax should therefore be adjusted to take into account the speed of
working, the workshop temperature and the composition of the wax mixture. During the pouring,
the candles may sway a little and stick together. If this happens they can be separated gently with
a knife, or by tapping. When a sufficient thickness of wax has been built up, the candles are
removed.
Colours and Effects
While candles are still warm they can be shaped and rolled in the same way as dipped candles (see
previous section). They can be poured using solid colour or given a coloured finishing coat.
Creative decorative effects are possible by experimenting with pouring multiple colours over
finished candles.
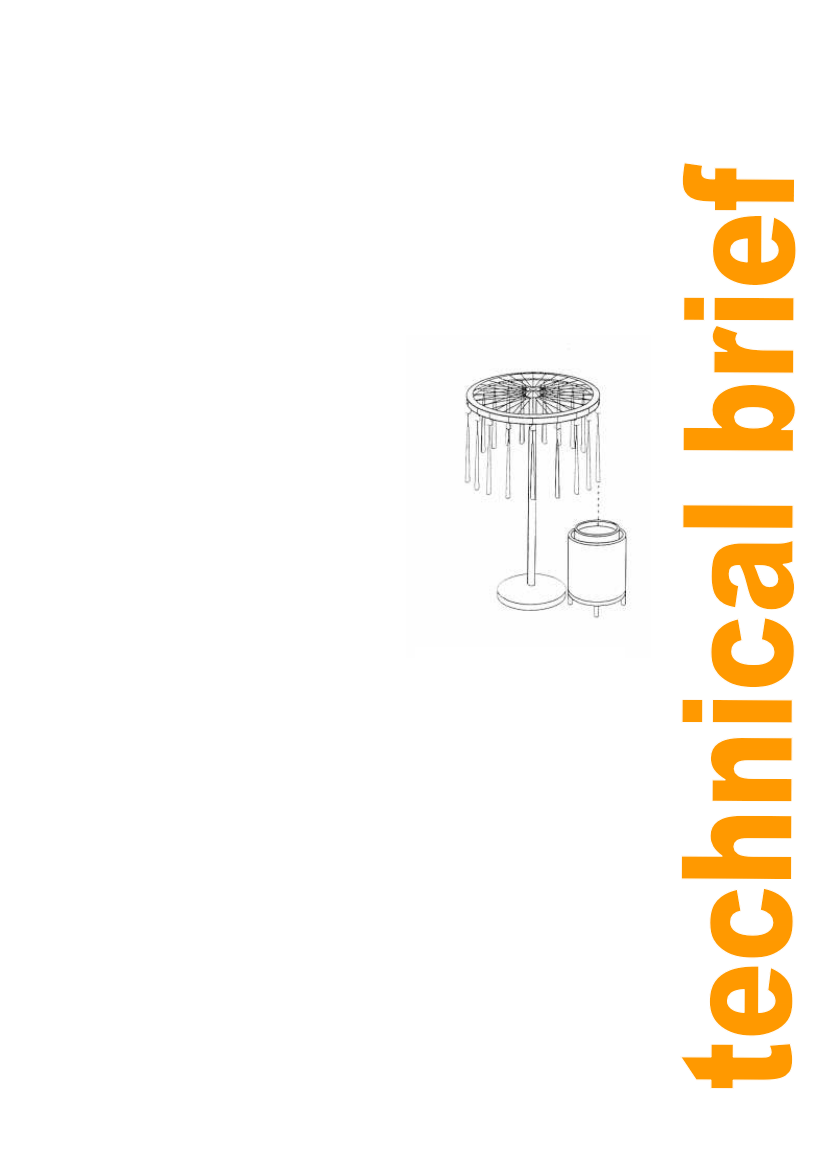
Equipment The equipment used in the pouring
process is very simple (see figure 6). It consists of an
old bicycle wheel in a horizontal plane supported by
a vertical shaft, the length of which is determined by
a suitable working position. The bottom end of the
shaft should be located in a heavy base-plate, to
ensure that the apparatus is safe for working. The
wheel must be able to rotate freely. Small metal
hooks made from thin wire are fixed to the outer rim
of the wheel, from which the candle wicks are
suspended. The wicks are weighted at their lower
ends. A heated container, similar to that used for
dipping, is positioned so that the outer rim of the
wheel is above the centre of the container. A small
ladle or jug is required for pouring the heated wax
over the wick. After each pouring, the wheel is
turned until the next wick is positioned above the
wax container and the process is repeated until all
the candles are of the required thickness.
Moulding
Figure 6: Pouring equipment
Candle moulding (or casting) is a method commonly used to make decorative and unusually
shaped candles. Each candle produced will need time to cool in its mould, and this can be a
limiting factor for large volume production, unless a large number of moulds are acquired.
Method
A blend of wax suitable for moulding is required. The ideal wax will be a hard paraffin wax (with a
melting point of about 60°C to 68°C). This is less likely to stick to the sides of the mould than a
softer lower melting point wax. A relatively high proportion of stearic acid may be added to improve
both the hardness of the candle and its shrinkage when cooling; thus aiding the removal of the
candle from the mould.
While the wax is melting the mould can be prepared. A suitable thickness wick should be primed
(see section on dipping) and threaded through the hole in the mould (there is usually a hole in the
bottom of the mould for this purpose). Seal the hole with mould sealant (available from
candlemaking suppliers) or an equivalent substance such as clay. Tie the other end of the wick to
a pencil (or equivalent) and ensure the wick is taut and centrally positioned.
When the temperature of the wax is about 90°C use a jug to carefully pour the wax into the centre
of the mould. Try to fill the mould at a slow but continuous rate, without splashing or pouring onto
the sides of the mould. After a minute or two give the mould a sharp tap to dislodge any trapped
air. Now the candle can be left to harden or placed in a water bowl to accelerate the cooling
7